
Did you know that the first steam-powered vehicle dates back to 1769 by Nicolas-Joseph Cugnot? Do you have a Japanese car and you’re looking to replace the battery? In this guide, you’ll learn how to do a replacing a battery in a Japanese car yourself. Read on to discover all about replacing it from start to finish and increase that torque!
Should You Replace the Car Battery Yourself?
Even if you’re not an expert mechanic, using this battery conversion chart, and following a car battery replacement guide, you can be successful. Keep in mind that replacing your battery will be a more intense task than replacing your windshield wiper blades.
While you might save money, it can be hazardous. When you buy and install your own car battery you’ll have more options with which to choose. You’ll have the choice of different retailers and brands instead of what the mechanic chooses.
The other benefit is that you can replace the battery on your schedule. Most shops are open during regular business hours, and some are open on the weekends. If your battery dies in the middle of the night you can head to a 24-hour shop and replace it yourself before work in the morning.
When To Choose a Mechanic?
If you’re looking for a quicker and less intense option, then choose a mechanic. You don’t have to worry about any hazardous materials or which engine to choose. Choose a mechanic when you’re comfortable paying more.
How To Know It’s Time for a Replacement
If you notice the check engine light is on, something might be up. A check engine light might mean a problem with your alternator, time for a tune-up, or that your battery is running out. If you’re not sure, you can either take it to a mechanic to check on it, or check your owner’s manual.
Your car might have a problem with the battery if you notice it takes longer to start. A vehicle that takes longer to start can mean that your battery is dying.
Checking Your Battery
First, before beginning, have a digital multimeter and protective glasses. Next, check the battery.
You can find most batteries underneath the hood. Sometimes, they’re in harder to find locations such as the trunk. If you can’t find it, check your owner’s manual.
Before testing your battery you’ll want to turn the ignition and lights off. Take the red lead to the positive battery cable and the negative battery cable.
Next, have your meter on the DC volts setting. It’ll tell you your battery voltage levels.
The higher the better. For example, 12.66 volts is 100% charged, but 11.89 volts is 0% charged.
Keep in mind that the charge amount doesn’t say whether your battery is good or bad, just the charge level. If your battery is low, you’ll want to charge it.
Tips for Picking Out the Right Car Battery
When choosing the correct Japanese car battery you can consult your owner’s manual. If you’d prefer to forego it and pick out your own, you’ll want to think of the age, size, brand, and other factors.
First, you’ll want to ensure that the car battery you choose will fit your car since battery sizes vary. Check the battery section of your owner’s manual for your current battery’s size.
Next, you’ll want to decide on the battery brand. Again, your best option is to go with the owner manual’s preference.
Avoid choosing the cheapest brand. They can come with defects, and might not work in the long run.
Time To Replace Your Car Battery
Before you begin replacing your car battery you’ll need rags, an old sheet or blanket, glasses for your eyes, rubber gloves, and a replacement battery. Your best option for a replacement battery is what’s in your owner’s manual.
Turn off the ignition and engine before you begin. This is an important safety component.
Corrosion or acid from the battery can make it flammable and create a short circuit or spark. When the engine and ignition are turned off, you can proceed.
First, open the bonnet. Inside the bonnet, you’ll find the car battery.
As above with testing your battery you’ll do a similar method with negative and positive terminals. There will be black wires.
There will be a retaining nut on the positive terminal. Pull that away and ensure it doesn’t touch the -ve terminal.
Next, place a rag on top of the positive terminal. This protects you from a short circuit or electric shock so it’s vital.
The Negatives
What you just did with the positive terminal you’ll repeat with the negative terminal. Place an old blanket over the wing of your car.
Next, find the securing bolt and loosen it. It’s normally found on the side of the battery.
After this, loosen the battery. Remove the clamp from securing the battery.
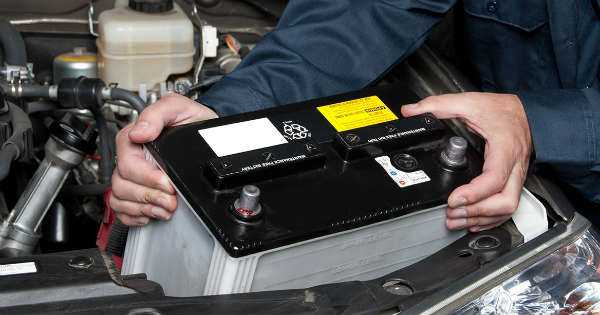
Start With the New
After the old battery is out, you can replace it with the new. Place the new battery vertically into where the old battery was. Put the securing clamp onto it to secure it.
Once you’re done with that you can remove the rags from the positive terminal and connect it. Repeat with the negative terminal. Make sure each is secure and that they won’t come in contact with each other.
A Guide on Replacing Your Japanese Car
Now that you’ve explored how to replace your Japanese car’s battery, you should have a better idea if you’re prepared to do it yourself. If you’re not feeling comfortable doing it, it’s best to hire a mechanic to ensure it’s done correctly and safely.
Would you like to read more auto content? For everything from bikes to trucks, check out our other articles today.